
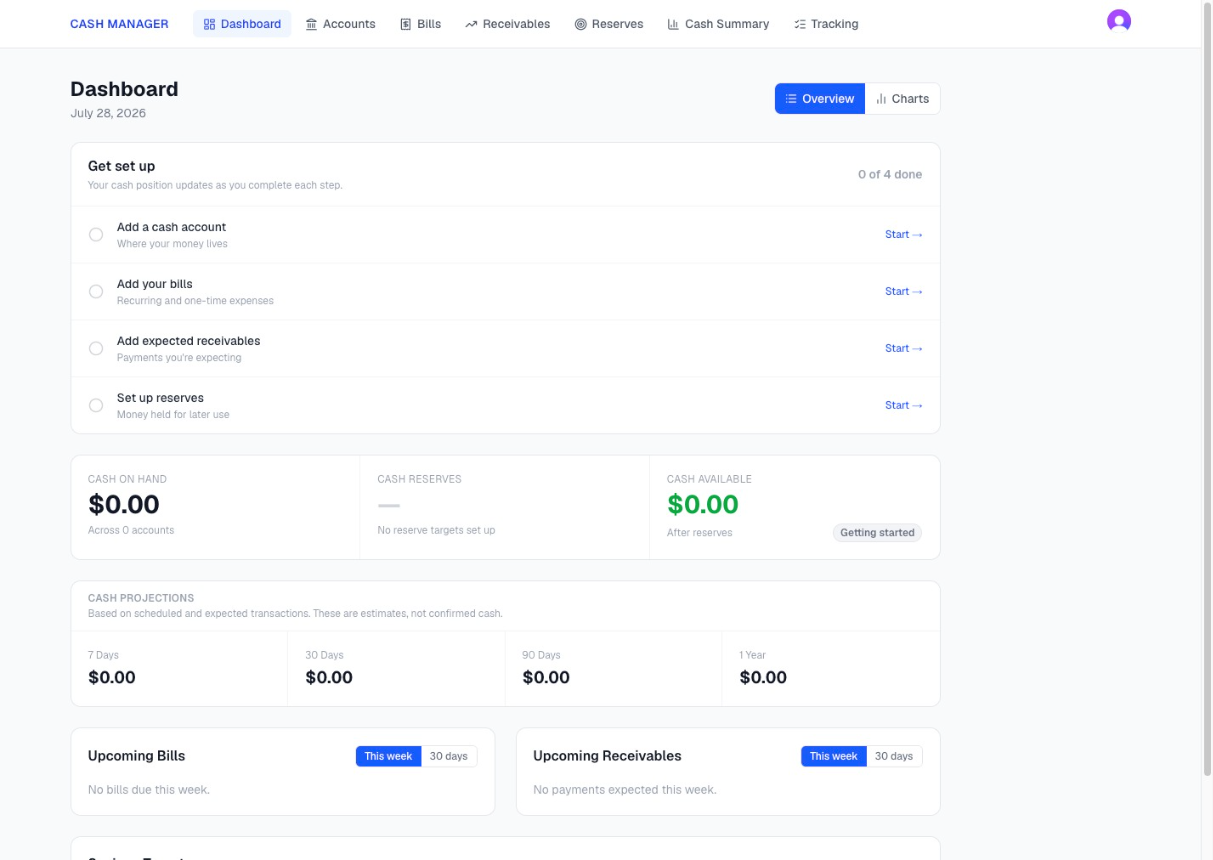
Step 1: Add A Cash Account
Where your money lives.
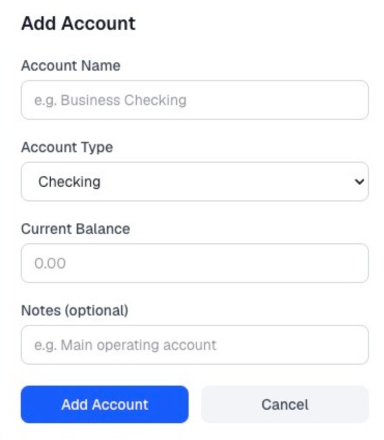
Add the checking, savings, cash drawer, petty cash, or other cash accounts your business uses.
Enter the balance showing in each account today. That becomes your starting point.
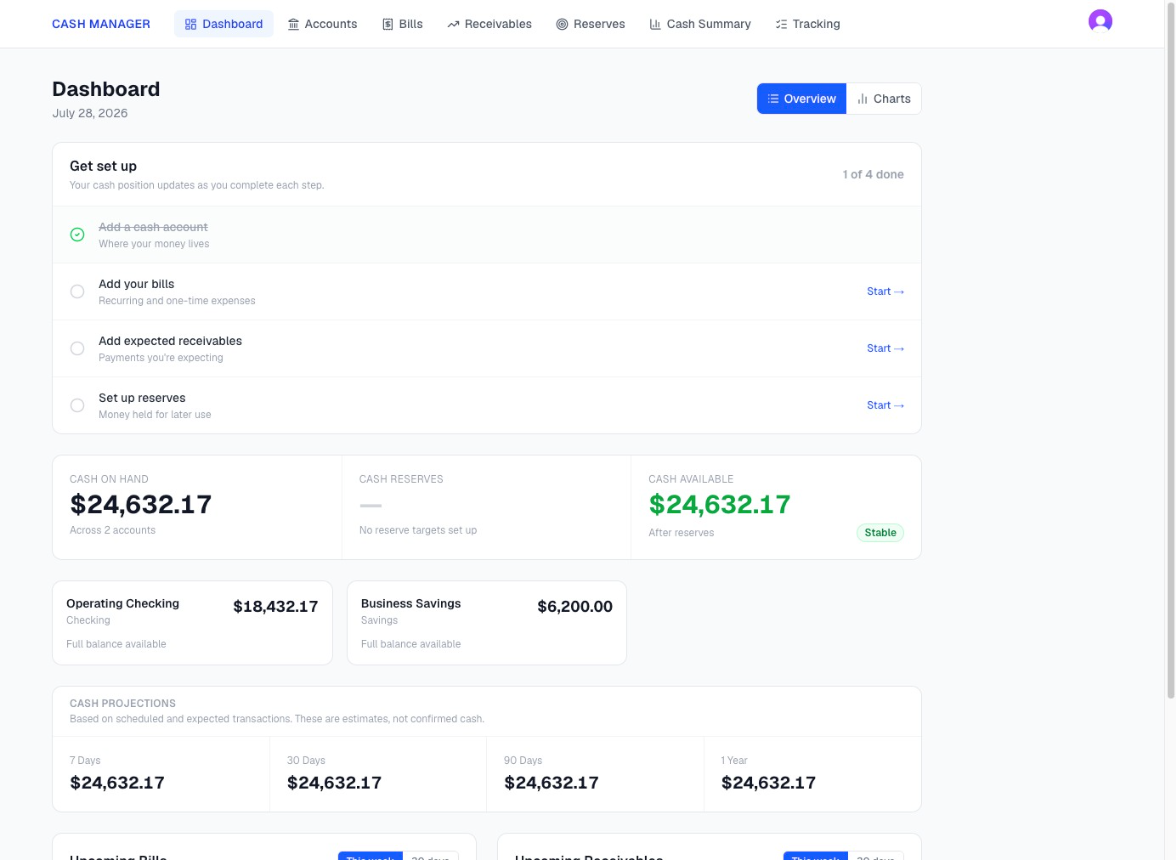
Screenshot view:
Click Add Account, and a box appears that lets you select the cash account type.
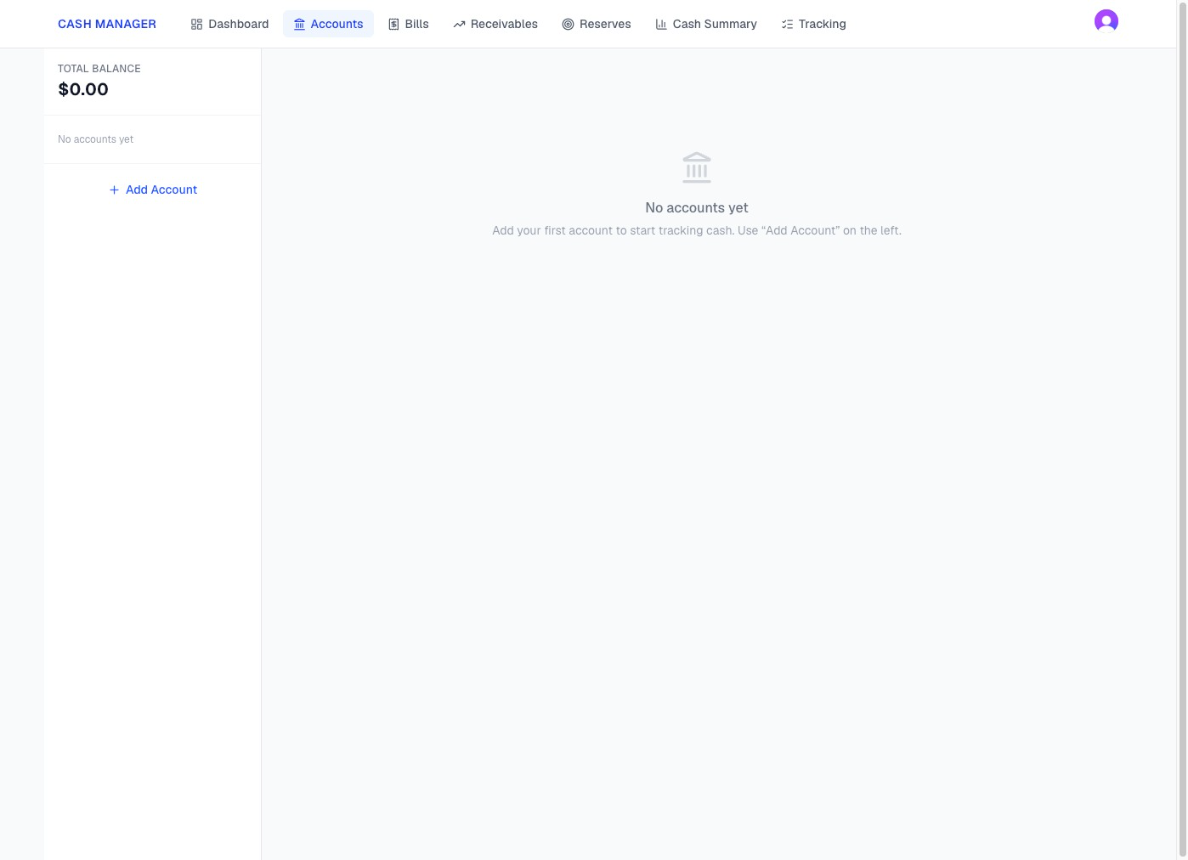
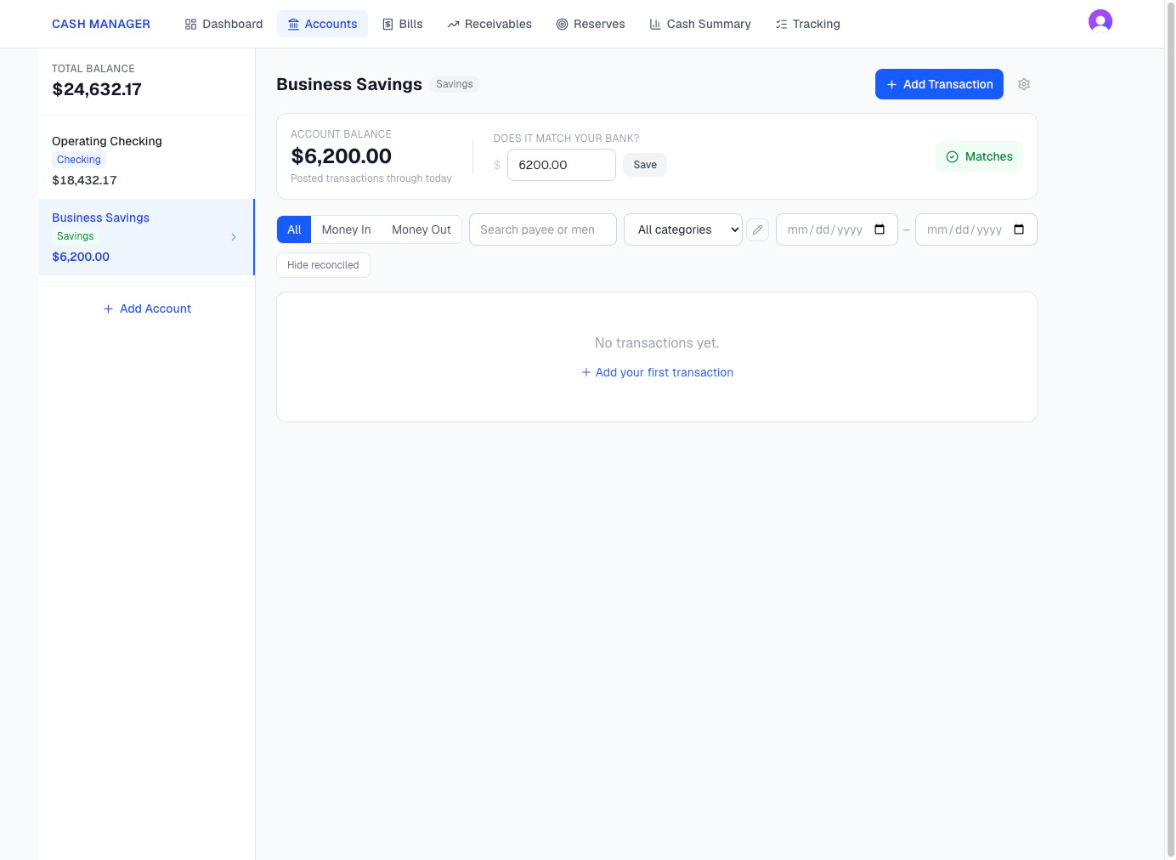
After adding the accounts, our first step is now complete.
Step 2: Add Your Bills
Recurring and one-time expenses.
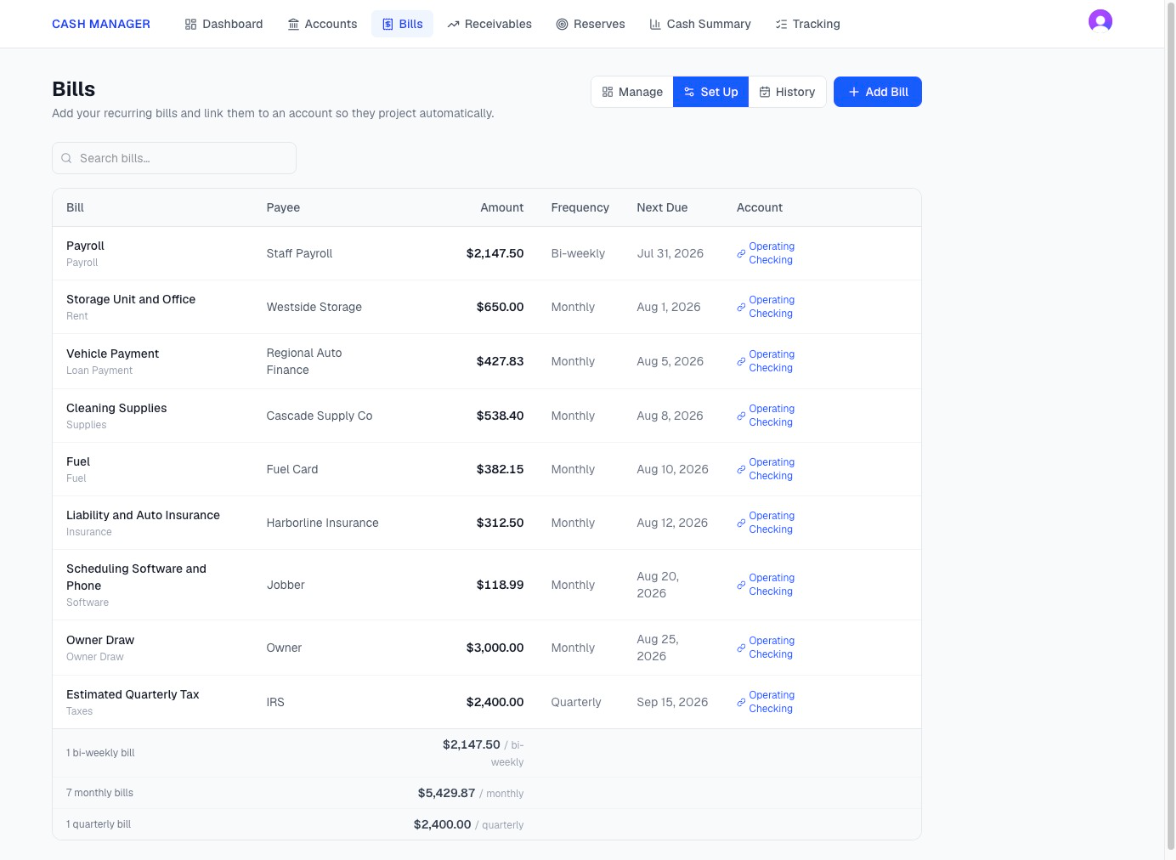
Add the bills and other payments you already know are coming.
Start with what you know today. You can add monthly, quarterly, annual, and one-time expenses whenever you remember them.
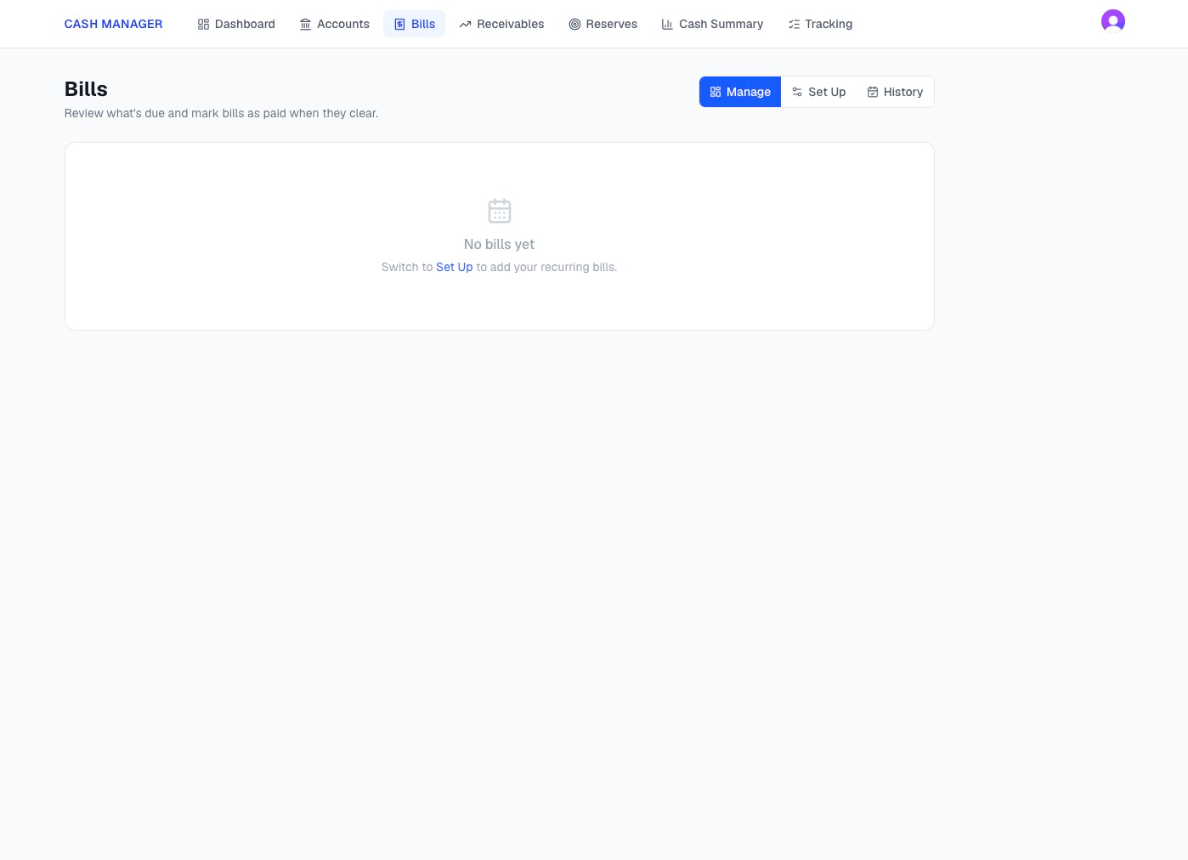
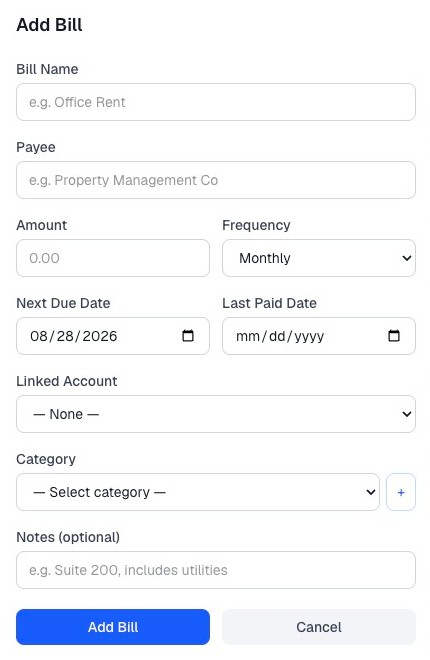
Screenshot view:
Choose the “Set Up” view to add bills. Click on the “Add Bill” button, and a box will let you create a one-time or recurring bill.
After adding the bills, our second step is now complete.
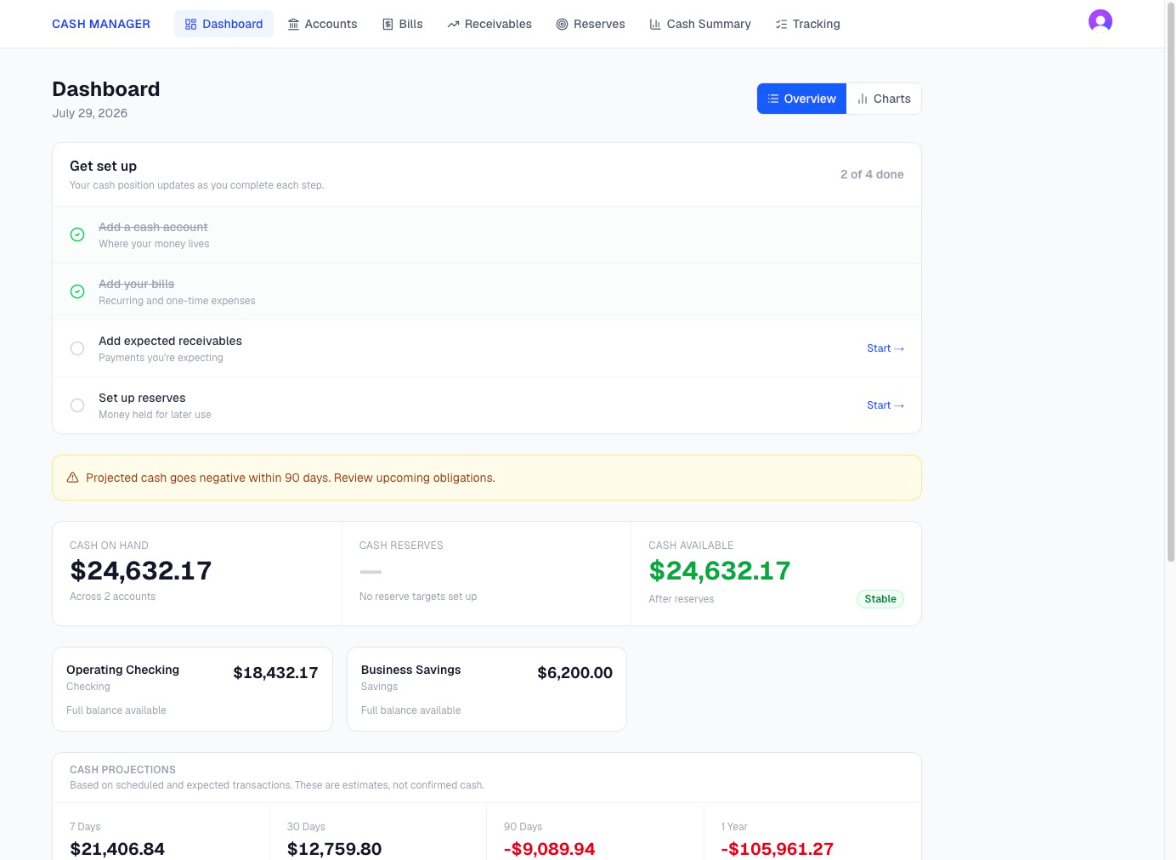
Step 3: Add Expected Receivables
Payments you are expecting.
Add invoices, deposits, and other payments you expect to receive.
Enter the date you expect the money so Cash Manager can include it in the projected cash picture.
Screenshot view:
Choose the “Set Up” view to add receivables. Click on the “Add Receivable” button, and a box will let you create a one-time or recurring receivable.
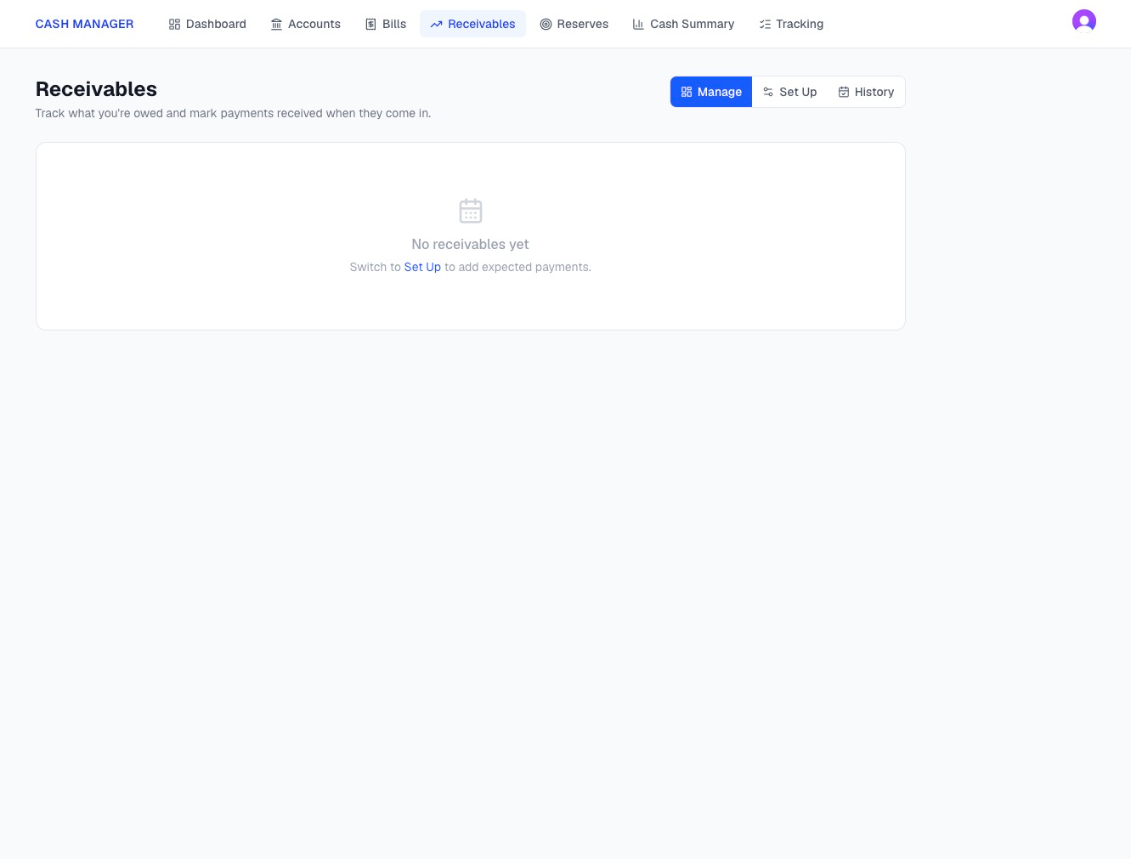
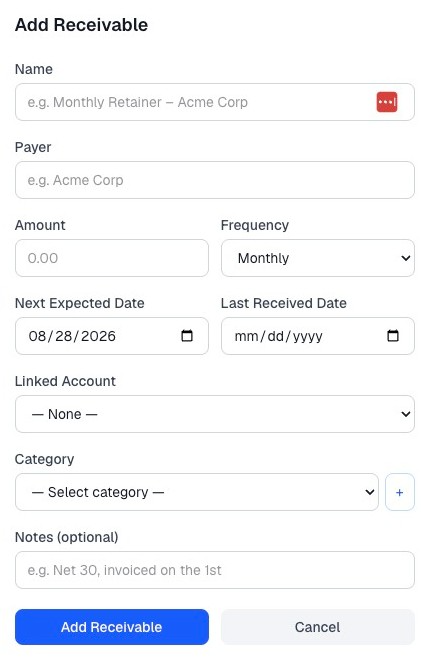
After adding the receivables, our third step is now complete.
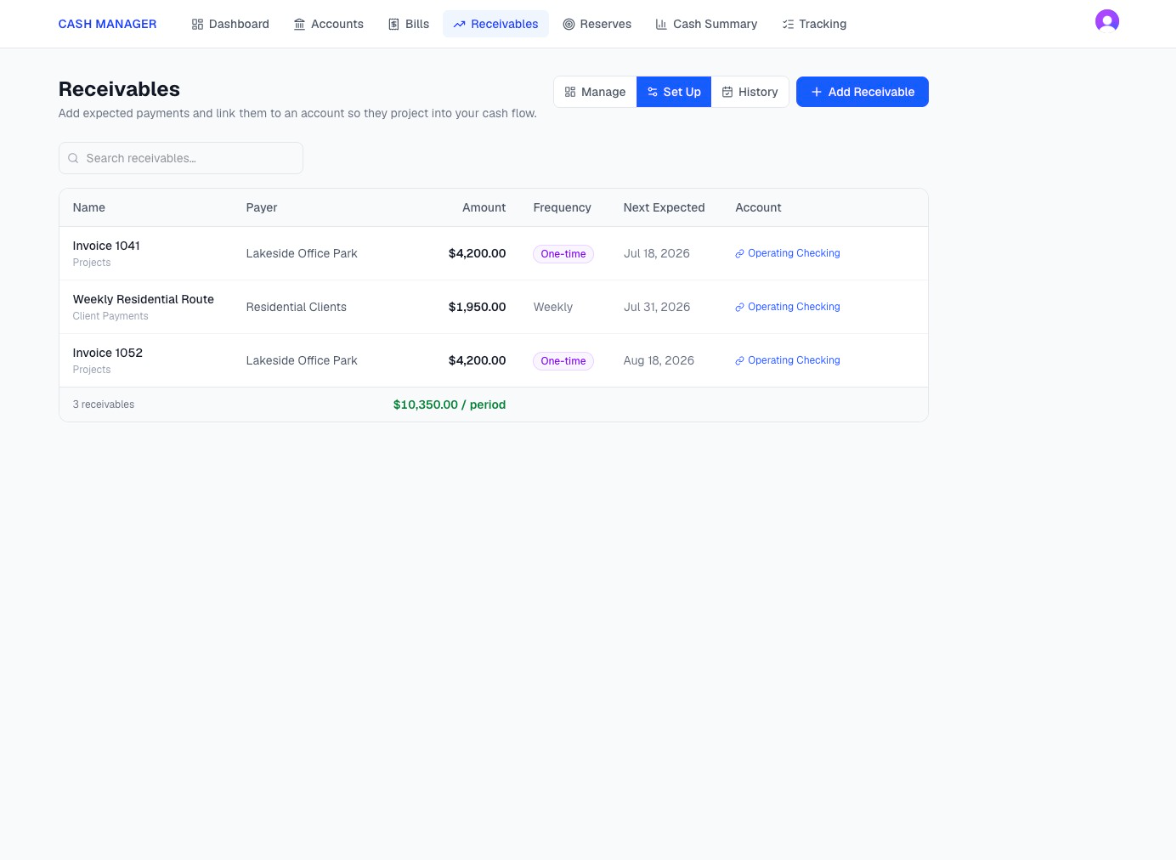
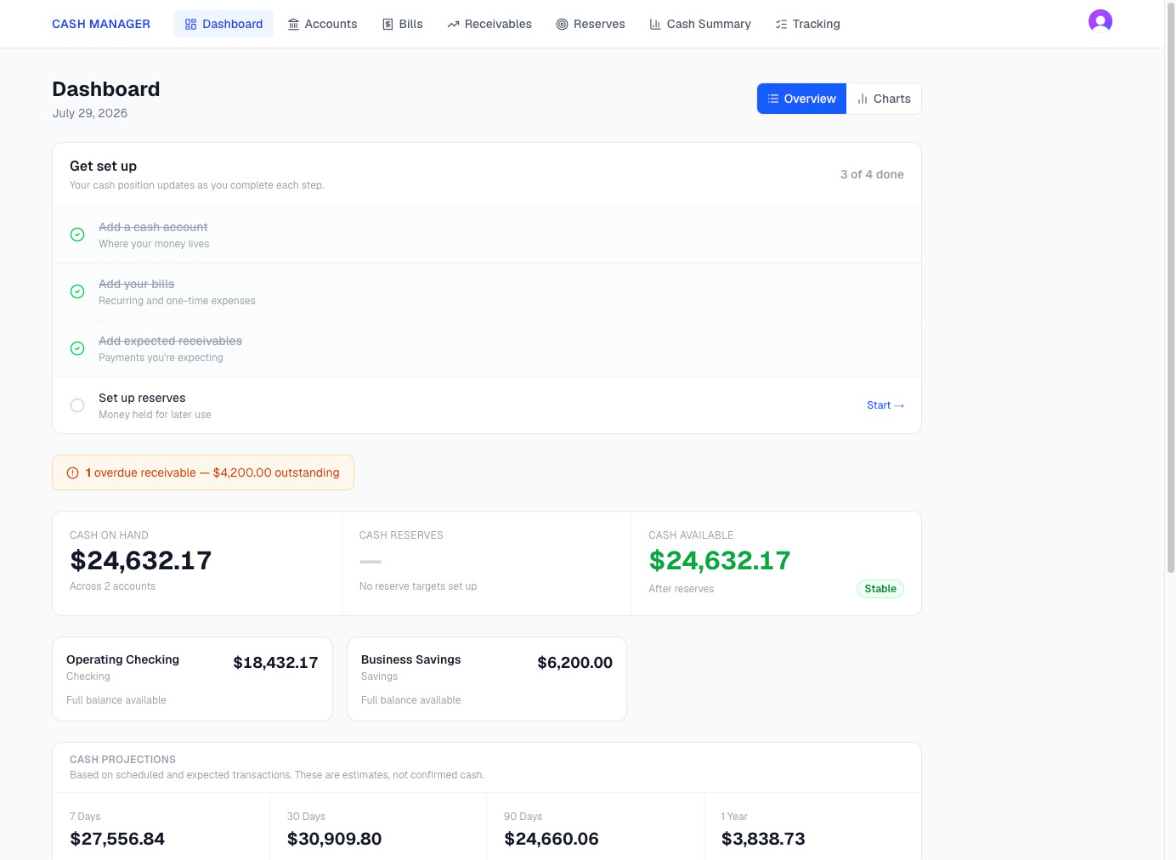
Step 4: Set Up Reserves
Money held for later use.
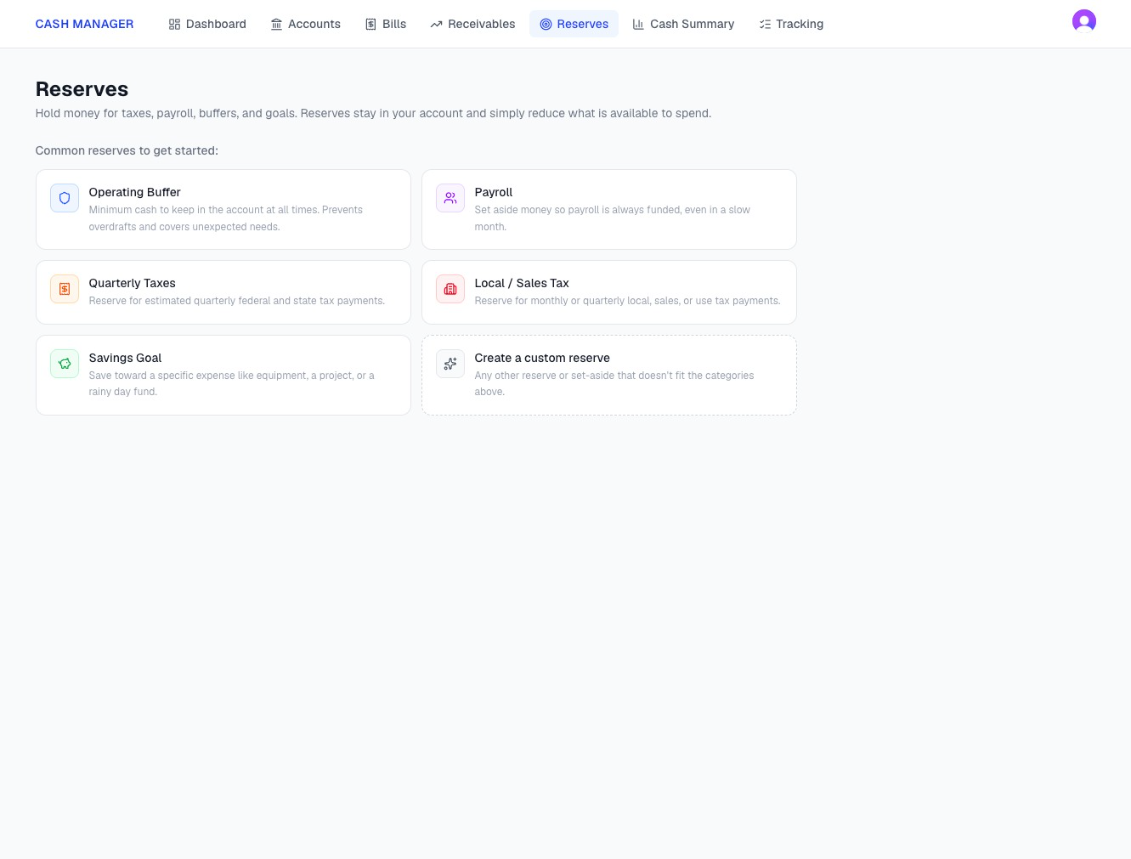
Set aside cash for taxes, payroll, an operating buffer, a savings goal, or another business need.
The cash stays in the account, but it no longer appears as available to use.
Screenshot view:
Choose one of the 6 Reserves types to set up a reserve for any cash account.
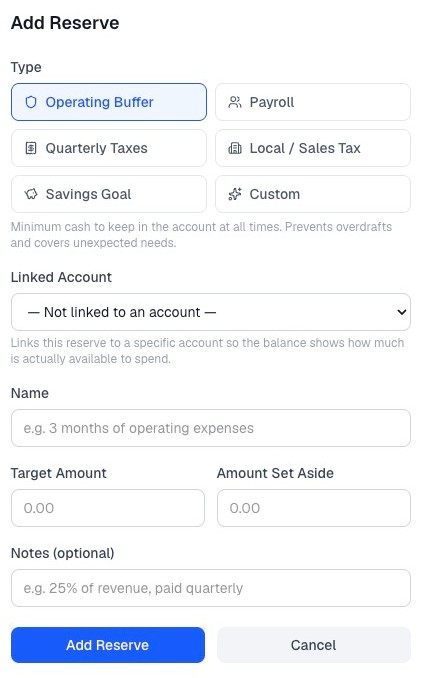
After adding the reserves, our fourth step is now complete.
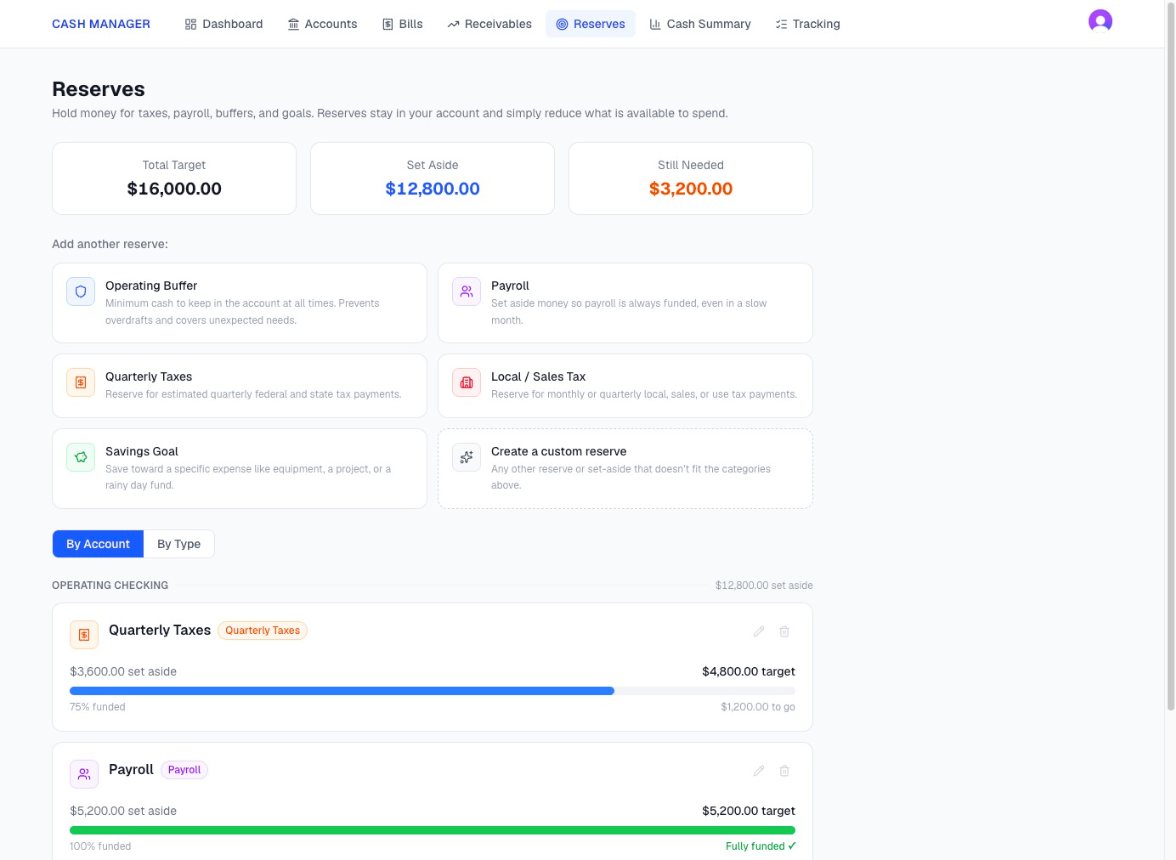
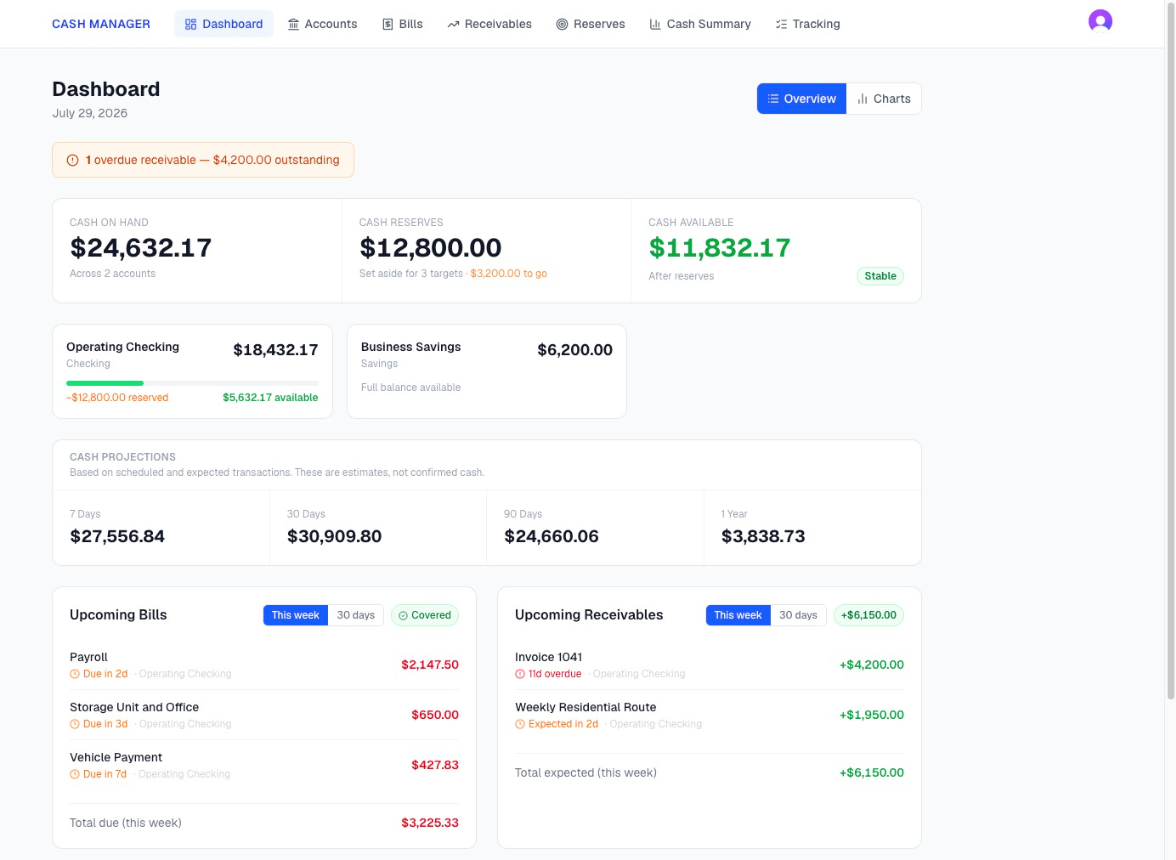
Understanding Your Cash Picture with the Cash Manager
You do not need a full transaction history before Cash Manager begins showing useful information.
Once you add your accounts, upcoming bills, expected receivables, and reserves, you can start seeing how your cash position may change over time.
In this walkthrough, the account appears covered through the current year, while the longer projection shows the cash running short in the following year.
The information is still limited, but it is already enough to reveal something the current bank balance does not show.
When You Want a More Complete Picture
The first four setup steps are enough to begin seeing your current and projected cash position.
When you are ready to add more detail, you can use a recent business bank statement to enter transactions that have already happened.
Before entering the transactions, change the account starting balance in Cash Manager to the opening balance shown on the statement. Then enter the money received and payments made during that statement period.
As you add the transactions, the Cash Manager balance will move from the statement opening balance to the statement closing balance. Compare the two amounts, review anything missing, correct any errors, and reconcile the account once they agree.
This step is optional. You can begin using Cash Manager from today or add a recent period of activity to build a more complete cash record.
What This Adds
Entering transactions allows you to review actual cash in and cash out, confirm which expected bills and payments occurred, and verify that Cash Manager matches the bank.
After setup, you are updating instead of rebuilding
Recurring bills and receivables appear when scheduled.
When the payment is made or received, select Add. Cash Manager records the transaction, updates the related bill or receivable, and schedules the next recurring item.
The initial setup time depends on how many bills and expected payments the business has. Entering them the first time is the main work.
Start with today. Build from there.
A payment method is required. Cancel before the trial ends and you will not be charged.